Skip to Content
  •  Designed in Canada Worldwide Delivery
  • Pricing and Quote Builder​​​​
Phoenix Domes
  • 0
    My Cart
  • English (US) Français (CA)
  • Sign in
  • Home
  • About
    • Our Story
    • Phoenix Domes Team
    • Our Innovations
    • Our Community
    • Customer Map
    • Why Phoenix Domes
  • Domes

    Our Domes


    4-Season Glamping Packages Glass DomesHard Panel DomesResidential DomesYoga/Studio DomesShort-term Rental DomesCustom Domes ZomesUnique StructuresGreenhouse Domes SpecialsRestaurant/Patio DomesEvent Domes

    Dome Upgrades


    Glass Panorama Window UpgradeGlass Skylight UpgradeInterior Wood PanelingAluminum Roof Panel UpgradeInsulation UpgradeOpening Triangle Glass Window

    Domes by Size


    16ft / 5 metres / 210 sqft20ft / 6 metres / 290 sqft23ft / 7 metres / 400 sqft26ft / 8 metres / 520 sqft30ft / 9 metres / 690 sqft33ft / 10 metres / 785 sqft

    EXTRAS


    Photo Galleries 360° Experience 3D Walkthroughs Success Stories & ReviewsInstallation & Setup GuidesJoin Our Affiliate ProgramFinancing Options

    Media


    Photo Galleries 360° Mobile Experience  3D Walkthroughs Reviews & Testimonials
  • Saunas, Tents and More
    • Glamping Tents
    • Cedar Saunas
    • Cedar Hot Tubs
    • Cedar Cold Plunges
    • Cedar Outdoor Showers
  • Shop
  • Financing Options
  • Dome Academy
    • Getting Started
    • Education Series
    • Resources & Guides
    • Ordering, Shipping & Delivery FAQ
    • Customer Map
    • Success Stories & Reviews
    • Newsletter Archive
  • Dome Life
  • Customer Map
  • Book a Call
Phoenix Domes
  • 0
    • Home
    • About
      • Our Story
      • Phoenix Domes Team
      • Our Innovations
      • Our Community
      • Customer Map
      • Why Phoenix Domes
    • Domes

      Our Domes


      4-Season Glamping Packages Glass DomesHard Panel DomesResidential DomesYoga/Studio DomesShort-term Rental DomesCustom Domes ZomesUnique StructuresGreenhouse Domes SpecialsRestaurant/Patio DomesEvent Domes

      Dome Upgrades


      Glass Panorama Window UpgradeGlass Skylight UpgradeInterior Wood PanelingAluminum Roof Panel UpgradeInsulation UpgradeOpening Triangle Glass Window

      Domes by Size


      16ft / 5 metres / 210 sqft20ft / 6 metres / 290 sqft23ft / 7 metres / 400 sqft26ft / 8 metres / 520 sqft30ft / 9 metres / 690 sqft33ft / 10 metres / 785 sqft

      EXTRAS


      Photo Galleries 360° Experience 3D Walkthroughs Success Stories & ReviewsInstallation & Setup GuidesJoin Our Affiliate ProgramFinancing Options

      Media


      Photo Galleries 360° Mobile Experience  3D Walkthroughs Reviews & Testimonials
    • Saunas, Tents and More
      • Glamping Tents
      • Cedar Saunas
      • Cedar Hot Tubs
      • Cedar Cold Plunges
      • Cedar Outdoor Showers
    • Shop
    • Financing Options
    • Dome Academy
      • Getting Started
      • Education Series
      • Resources & Guides
      • Ordering, Shipping & Delivery FAQ
      • Customer Map
      • Success Stories & Reviews
      • Newsletter Archive
    • Dome Life
    • Customer Map
    • Book a Call
  •  Designed in Canada Worldwide Delivery
  • Sign in
  • English (US) Français (CA)
  • Pricing and Quote Builder​​​​

Setting Up Your Phoenix Dome

  • All Blogs
  • Dome Academy
  • Setting Up Your Phoenix Dome
  • November 17, 2023 by
    Setting Up Your Phoenix Dome
    team

    After receiving your dome kit from Phoenix Domes, it's time to bring your dream dome to life. This blog post will guide you through the setup process, from the initial sorting of materials to the final installation.

     Download a Printable Guide To Setting Up Your Glamping Dome Package
    Step 1: Gather Your Documents

    Before you begin, you'll need four sets of documents. Familiarize yourself with these in advance, and consider watching our "Assembling Your Phoenix Dome" instructional video. Download these documents to a laptop, tablet, or print them out for easy reference on setup day. 

    You'll need the following (download the appropriate document for your dome on the resources page):

    1. Setup Instructions: A step-by-step reference guide for installation.
    2. Setup Diagram: Specific instructions for assembling the frame of your dome.
    3. Interior Oxford Liner Installation Diagram: Helps you place the interior liner pieces correctly (applicable to all 4-Season Glamping Packages and certain Custom Domes).
    4. Curtain Kit Installation Instructions: Final step before you start bringing in furnishings (applicable to all 4-Season Glamping Packages and certain Custom Domes).


    Step 2: Gather Tools and Materials

    Ensure you have the following tools and materials ready before you start:

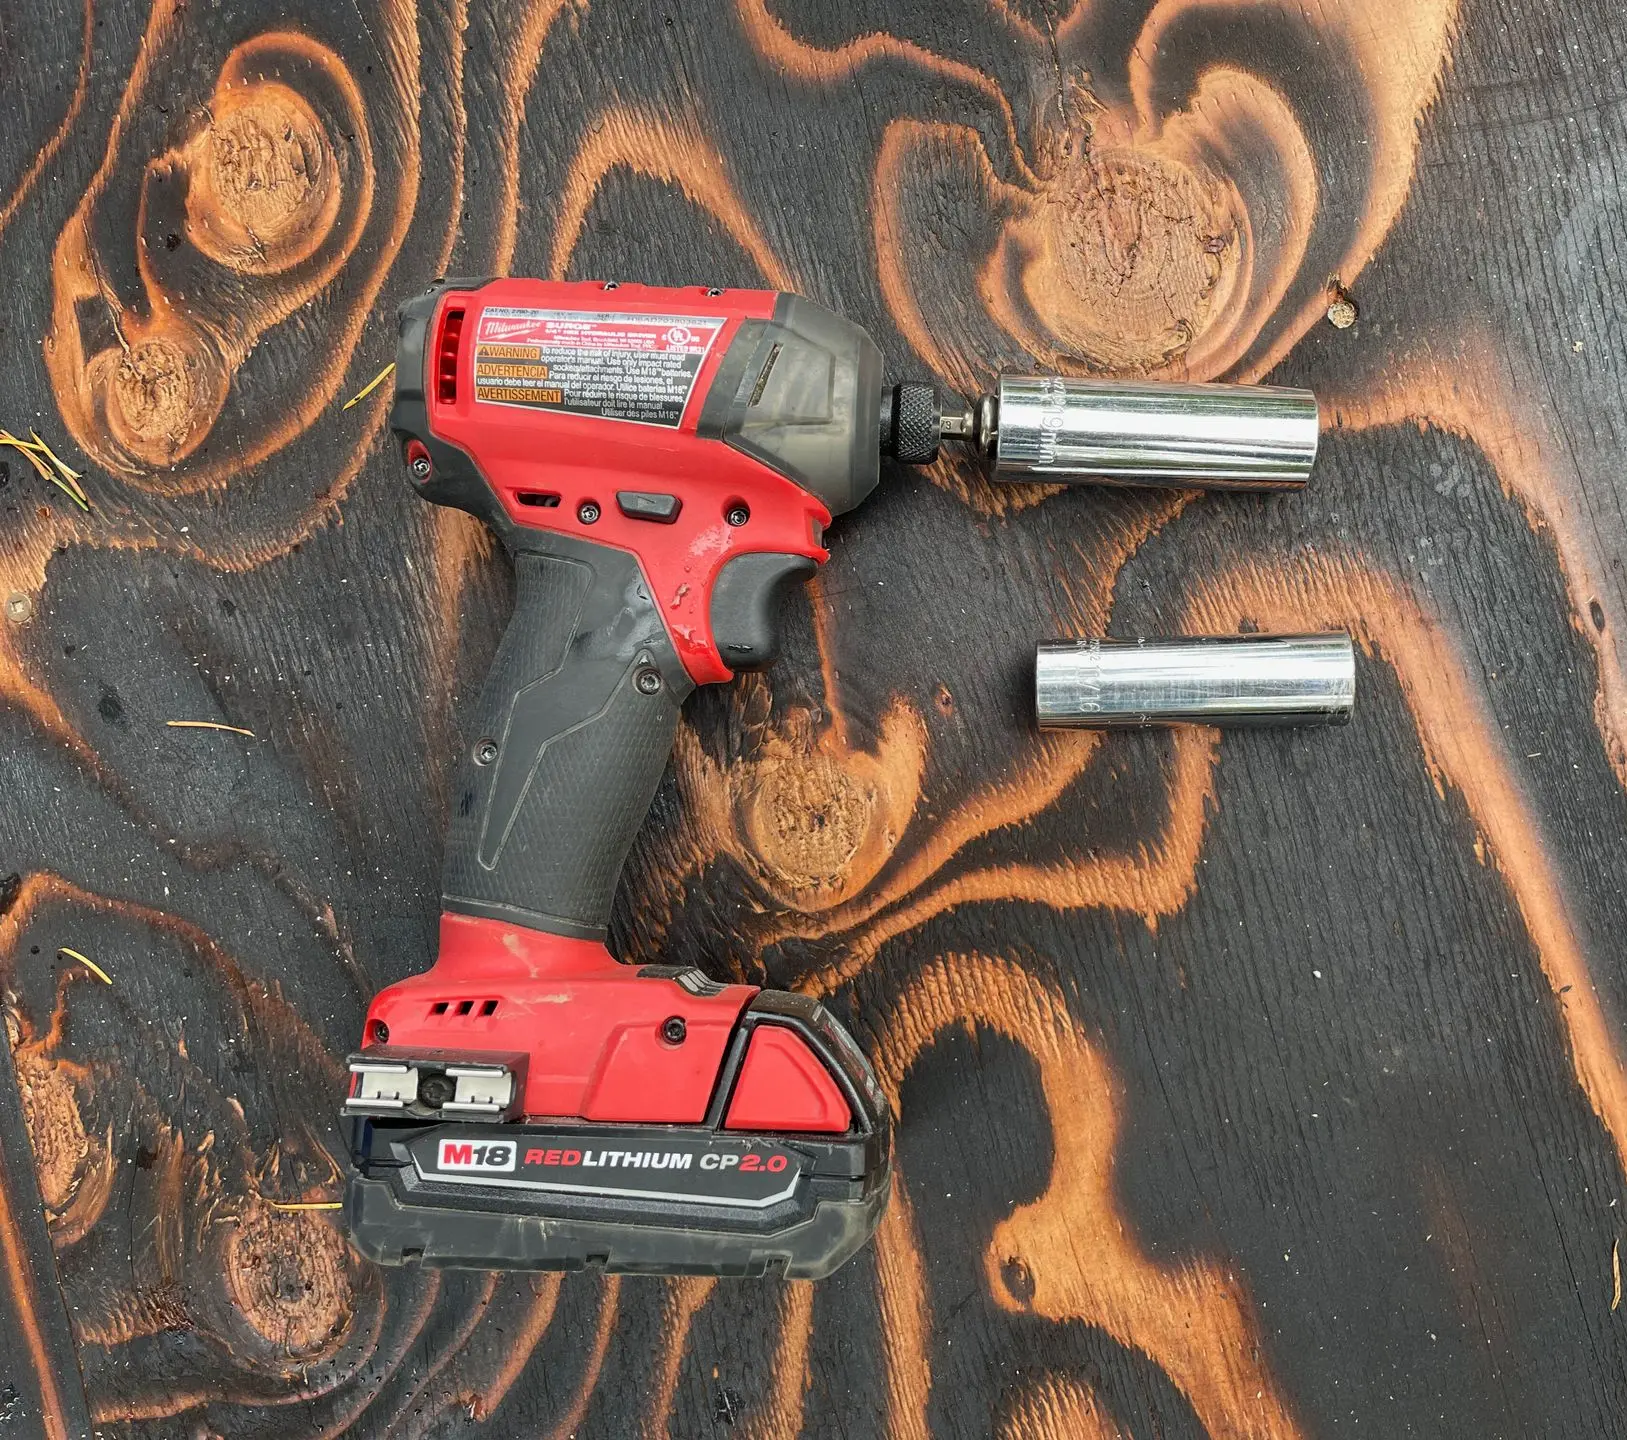
    1. Impact driver(s) with long 17mm and 19mm sockets
    2. 1-2 sturdy standup ladders (or rolling scaffold for 8m+ domes) + hard hats
    3. A long, strong rope and a soccer ball (or similar) for pulling the cover
    4. A winch, vehicle, or a group of friends for assistance
    5. 2x8 lumber, chop saw, level, measuring tape, screws, and screw gun for the door frame
    6. Strong tape and scissors or an Exacto knife
    7. Ratchet straps x 6
    Step 3: Sort Your Materials

    Begin by sorting all the components of your dome kit. This includes the frame pieces, cover, and any additional components like the Oxford liner and curtain kit. Organize them by type and size to make the assembly process smoother.

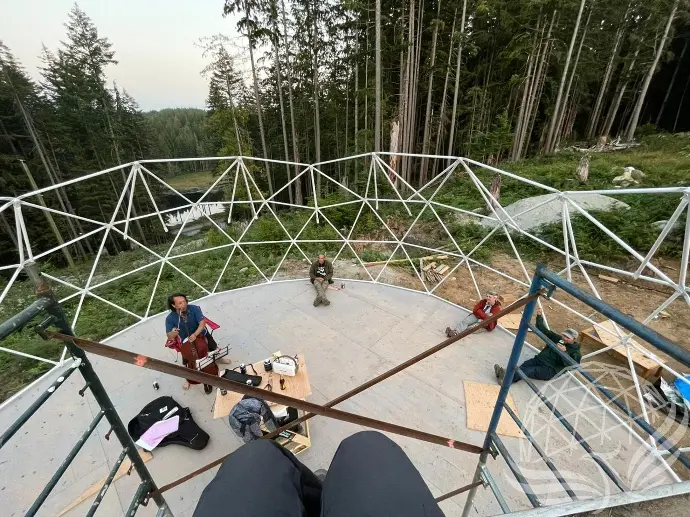
    Step 4: Assemble the Frame 

    Using the setup diagram and instructions, start assembling the frame of your dome. This step involves connecting the struts and hubs to form the geodesic structure. 

    Make sure all connections are secure and that the frame is stable before proceeding.

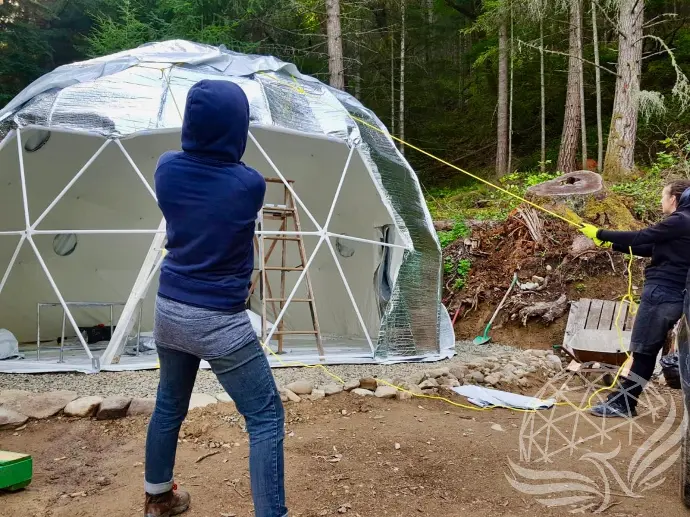
    Step 5: Install the Cover 

    Once the frame is assembled, it's time to pull the cover over the structure. Use the long, strong rope and soccer ball to help maneuver the cover into place. 

    This step might require a winch, vehicle, or a group of friends for assistance. Secure the cover using the ratchet straps to ensure a tight fit.​

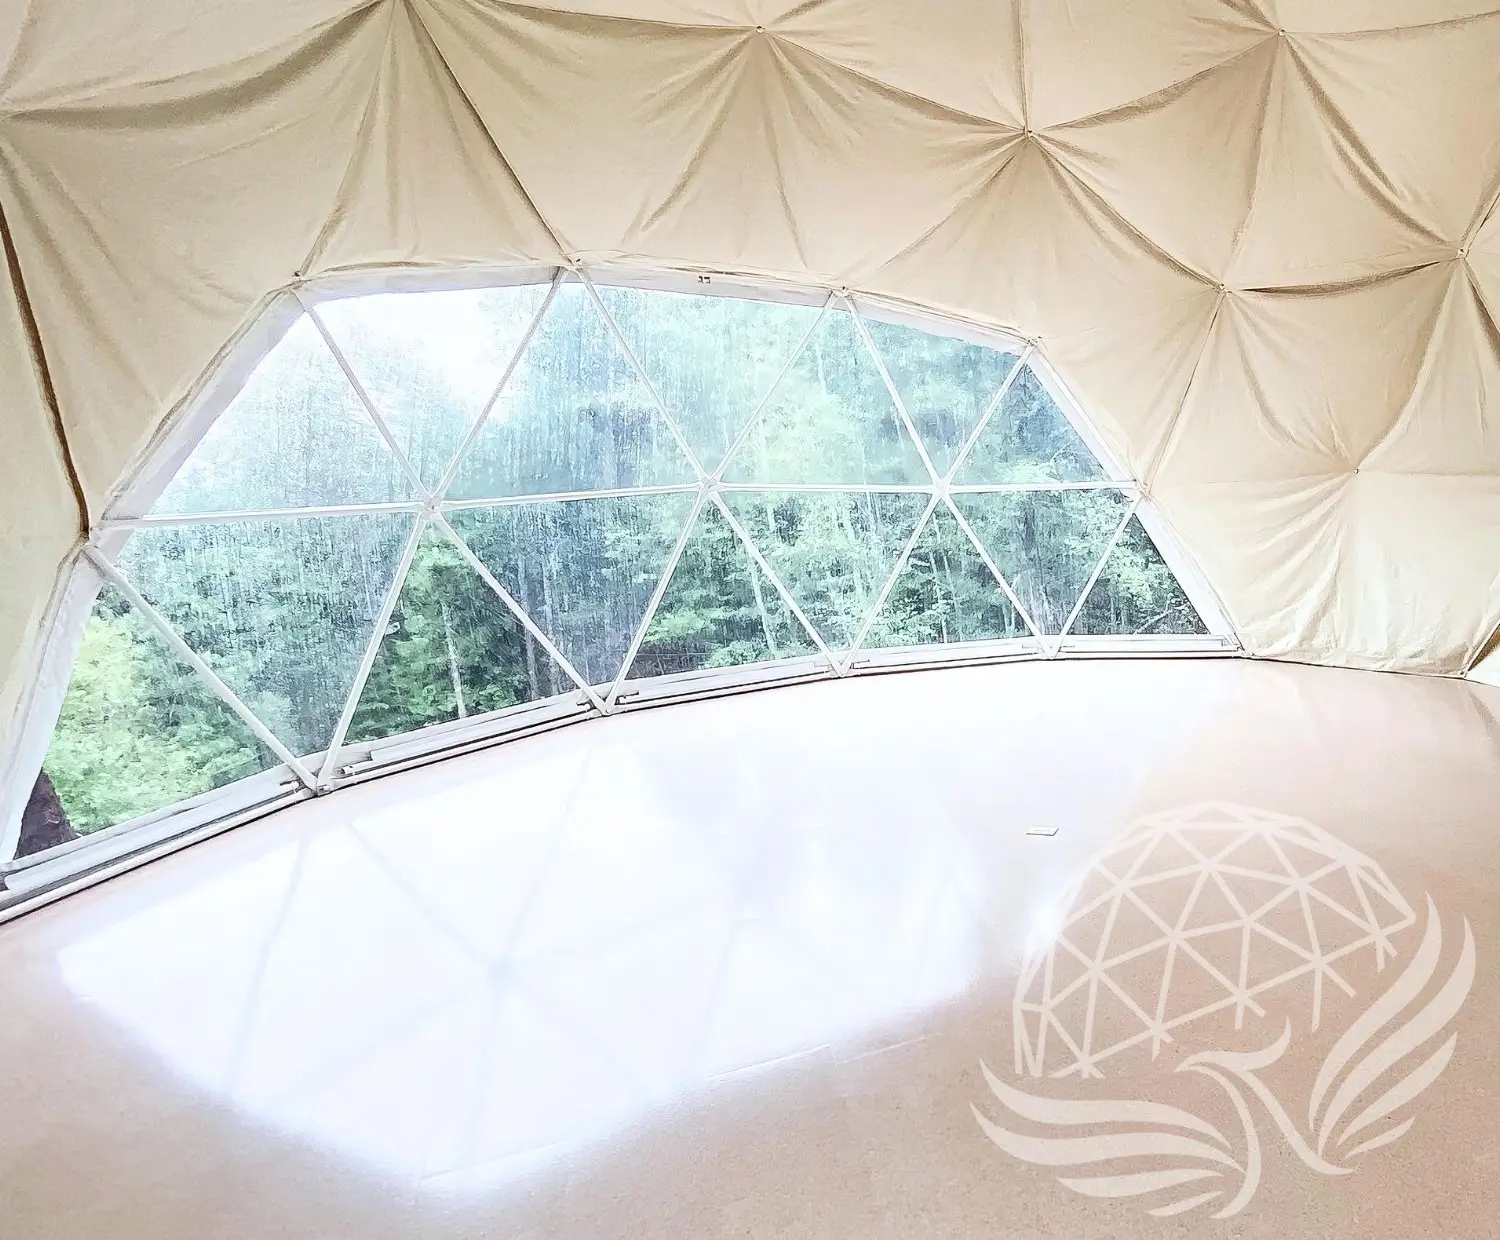
    Step 6: Install the Interior Oxford Liner and Curtain Kit 

    For domes with the 4-Season Glamping Package or certain custom domes, install the interior Oxford liner according to the provided diagram. 

    This liner helps insulate the dome and gives the interior a polished look. Finally, follow the curtain kit installation instructions to add privacy and comfort to your dome.

    Step 7: Final Checks and Furnishings

    After the structure is fully assembled, perform a final check to ensure all components are securely in place. Make any necessary adjustments. Once satisfied, you can start bringing in your furnishings and personal touches to make the dome your own.

    Final N​ote​s

    Setting up your Phoenix Dome is a rewarding process that transforms a collection of materials into a beautiful, functional living space. By following these steps and utilizing the resources provided, you'll be well on your way to enjoying your new dome. For more detailed instructions and support, visit our Resources page.

    Happy building!

    in Dome Academy
    # Instruction & Installation Guides
    Can I Build a Washroom in My Dome?

    -Phoenix Domes- 

    Ready to take the next step in enhancing your dome? 

    Reach out to Phoenix Domes today, and let’s make your space even better!


    Get involved

    JOIN OUR COMMUNITY


      Canadian Owned & Operated

    Contact

    contact@phoenixdomes.com

    ph: +1 (888) 983-7513

       Secure Payment Methods

    CUSTOMER SERVICE


    Financing Options

    Book Appointment

    Shipping & Delivery FAQ

    Installation Guides


    • ​
    • ​
    • Terms of Services
    • •​
    • Privacy Policy
    • •​   Website by Cloud9 Marketing
    Copyright © Phoenix Domes 2024
    Powered by Odoo - The #1 Open Source eCommerce