Skip to Content
  •  Designed in Canada Worldwide Delivery
  • Pricing and Quote Builder​​​​
Phoenix Domes
  • 0
    My Cart
  • English (US) Français (CA)
  • Sign in
  • Home
  • About
    • Our Story
    • Phoenix Domes Team
    • Our Innovations
    • Our Community
    • Customer Map
    • Why Phoenix Domes
  • Domes

    Our Domes


    4-Season Glamping Packages Glass DomesHard Panel DomesResidential DomesYoga/Studio DomesShort-term Rental DomesCustom Domes ZomesUnique StructuresGreenhouse Domes SpecialsRestaurant/Patio DomesEvent Domes

    Dome Upgrades


    Glass Panorama Window UpgradeGlass Skylight UpgradeInterior Wood PanelingAluminum Roof Panel UpgradeInsulation UpgradeOpening Triangle Glass Window

    Domes by Size


    16ft / 5 metres / 210 sqft20ft / 6 metres / 290 sqft23ft / 7 metres / 400 sqft26ft / 8 metres / 520 sqft30ft / 9 metres / 690 sqft33ft / 10 metres / 785 sqft

    EXTRAS


    Photo Galleries 360° Experience 3D Walkthroughs Success Stories & ReviewsInstallation & Setup GuidesJoin Our Affiliate ProgramFinancing Options

    Media


    Photo Galleries 360° Mobile Experience  3D Walkthroughs Reviews & Testimonials
  • Saunas, Tents and More
    • Glamping Tents
    • Cedar Saunas
    • Cedar Hot Tubs
    • Cedar Cold Plunges
    • Cedar Outdoor Showers
  • Shop
  • Financing Options
  • Dome Academy
    • Getting Started
    • Education Series
    • Resources & Guides
    • Ordering, Shipping & Delivery FAQ
    • Customer Map
    • Success Stories & Reviews
    • Newsletter Archive
  • Dome Life
  • Customer Map
  • Book a Call
Phoenix Domes
  • 0
    • Home
    • About
      • Our Story
      • Phoenix Domes Team
      • Our Innovations
      • Our Community
      • Customer Map
      • Why Phoenix Domes
    • Domes

      Our Domes


      4-Season Glamping Packages Glass DomesHard Panel DomesResidential DomesYoga/Studio DomesShort-term Rental DomesCustom Domes ZomesUnique StructuresGreenhouse Domes SpecialsRestaurant/Patio DomesEvent Domes

      Dome Upgrades


      Glass Panorama Window UpgradeGlass Skylight UpgradeInterior Wood PanelingAluminum Roof Panel UpgradeInsulation UpgradeOpening Triangle Glass Window

      Domes by Size


      16ft / 5 metres / 210 sqft20ft / 6 metres / 290 sqft23ft / 7 metres / 400 sqft26ft / 8 metres / 520 sqft30ft / 9 metres / 690 sqft33ft / 10 metres / 785 sqft

      EXTRAS


      Photo Galleries 360° Experience 3D Walkthroughs Success Stories & ReviewsInstallation & Setup GuidesJoin Our Affiliate ProgramFinancing Options

      Media


      Photo Galleries 360° Mobile Experience  3D Walkthroughs Reviews & Testimonials
    • Saunas, Tents and More
      • Glamping Tents
      • Cedar Saunas
      • Cedar Hot Tubs
      • Cedar Cold Plunges
      • Cedar Outdoor Showers
    • Shop
    • Financing Options
    • Dome Academy
      • Getting Started
      • Education Series
      • Resources & Guides
      • Ordering, Shipping & Delivery FAQ
      • Customer Map
      • Success Stories & Reviews
      • Newsletter Archive
    • Dome Life
    • Customer Map
    • Book a Call
  •  Designed in Canada Worldwide Delivery
  • Sign in
  • English (US) Français (CA)
  • Pricing and Quote Builder​​​​

Geodesic Dome Exact Fit Platform Build

  • All Blogs
  • Dome Academy
  • Geodesic Dome Exact Fit Platform Build
  • June 13, 2024 by
    Geodesic Dome Exact Fit Platform Build
    team

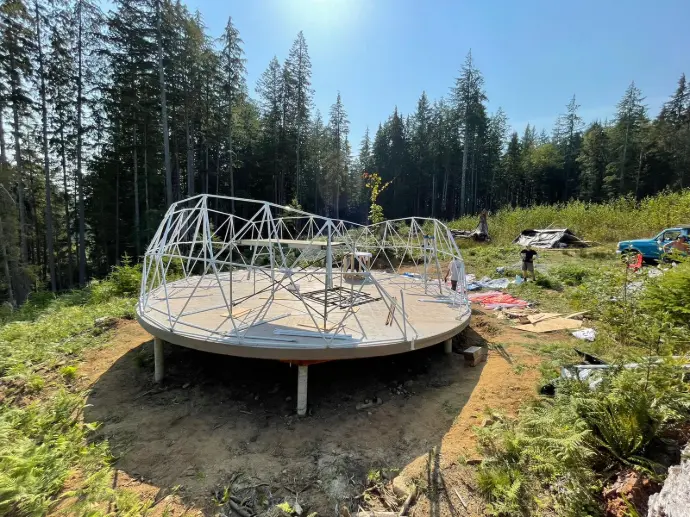
    Why not a round platform?

    Geodesic Dome Exact Fit Platform Build

    While a round platform can work alright for larger domes (4V or higher frequency), it is not recommended for our most popular 3V domes as the curve would stick out in between the hubs.

    Follow our precision de​signed Exact Fit Platform Plans for the best results!

    Deck Bl​ocks and Runners 
    • These are the​ bottom supporting structure. Please note that the runner structure has less sides than the upper joist structure - this may seem strange, but it saves material, time, cuts, and deck blocks, while supporting all sides of the joist structure! 
    • If you find this confusing, you may modify the runner structure to have the same outer measurement as the joist structure. 
    • They are cut out of treated 4x6 beams. If you cannot find these at your local building supply, a triple layer of 2x6 lumber will also work like in the picture below. 
    • On level ground, the runner structure can rest directly on post saddles on the deck blocks.
    • On sloped ground, you will need to use posts or screw piles in order to build up the support structure.
    Geodesic Dome Exact Fit Platform Build
    Geodesic Dome Exact Fit Platform Build


    Use post saddles on top of the deck blocks - they will need to be larger than the beams to accommodate for the angle Use simpson strong ties on the corners and joist hangers where the joists meet the perimeter.

    Geodesic Dome Exact Fit Platform Build
    Geodesic Dome Exact Fit Platform Build

    Geodesic Dome Exact Fit Platform Build

    Now we are coming to the most confusing part we always get asked about: How does the bottom layer of plywood sit on the runners? The answer is - it doesn’t. It is attached to the underside of the joist structure. 

    Build your 2x6 joist structure according to the plans and cut list, using joist hangers and tie plates. Then slide the plywood underneath piece buy piece with some help and screw it into the underside of the joists from the bottom. 

    You may want to build the joist structure in sections to make this easier.

    It may make sense to build the joist structure in sections so that it is easier to attach the plywood to the underside.

    Geodesic Dome Exact Fit Platform Build

    Geodesic Dome Exact Fit Platform Build

    Once all the bottom plywood is in place, trim the edges and you can place the insulation batting between the joists. We recommend Rockwool as it is more resistant to moisture and critters don’t like to live in it. 

    The bottom plywood provides more structural rigidity, however we have seen people use hardware cloth (fine, rodent proof stainless steel mesh) on the bottom to hold the insulation as well.

    Geodesic Dome Exact Fit Platform Build

    Geodesic Dome Exact Fit Platform Build

    At this point you will also want to make sure that all your services are in place - plumbing, wiring, ducting etc.

    Geodesic Dome Exact Fit Platform Build

    Geodesic Dome Exact Fit Platform Build

    Lay our the subfloor 3/4" plywood on the joists according to the pattern on the plans and screw it down. You may want to use wood filler in the cracks.

    Geodesic Dome Exact Fit Platform Build

    Geodesic Dome Exact Fit Platform Build

    Tip: for a low-budget yet beautiful floor, you can use a tiger torch to lightly burn the plywood and bring out the wood grain, and then apply a couple of layers of clear flooring finish to seal it. Please make sure to do this BEFORE you set up your dome so it doesn’t light ​on fire!

    Geodesic Dome Exact Fit Platform Build

    Geodesic Dome Exact Fit Platform Build

    a geodesic dome under construction

    Foundation Considerations for ExactFit Platform Plans  

      Our ExactFit platform plans are designed with concrete pier blocks, which require level, firm ground for proper installation. If your site is uneven or has challenging terrain, you may need to modify the foundation accordingly:

    • Sloped Ground: Use posts under the deck corners to level the structure.
    • Rocky Terrain: Consider poured concrete footings for added stability.
    • Soft Ground: Screw piles provide a secure and adjustable foundation.

    For site-specific recommendations, consult a local builder or engineer to ensure the best foundation for your dome.


    Weatherproofing your Dome 

    Start by stapling the cover skirt to the outside edge of your exact fit platform. With the removable panorama window, you will not want to staple the skirt below the window. You could apply sticky velcro tape to seal it and still be able to open it. We have found a type of PVC trim on a roll (shur trim wall base at home depot) useful for both the outside and inside edges of the dome. You can staple or screw it and caulk the screw holes.

    Geodesic Dome Exact Fit Platform Build


    in Dome Academy
    # Instruction & Installation Guides Planning & Design
    Permitting Process for Your Phoenix Dome

    -Phoenix Domes- 

    Ready to take the next step in enhancing your dome? 

    Reach out to Phoenix Domes today, and let’s make your space even better!


    Get involved

    JOIN OUR COMMUNITY


      Canadian Owned & Operated

    Contact

    contact@phoenixdomes.com

    ph: +1 (888) 983-7513

       Secure Payment Methods

    CUSTOMER SERVICE


    Financing Options

    Book Appointment

    Shipping & Delivery FAQ

    Installation Guides


    • ​
    • ​
    • Terms of Services
    • •​
    • Privacy Policy
    • •​   Website by Cloud9 Marketing
    Copyright © Phoenix Domes 2024
    Powered by Odoo - The #1 Open Source eCommerce