
Creating a solid foundation for your Phoenix Dome is crucial for ensuring stability, comfort, and longevity. Here are some general considerations and options for building platforms, tailored to meet the diverse needs of our customers.
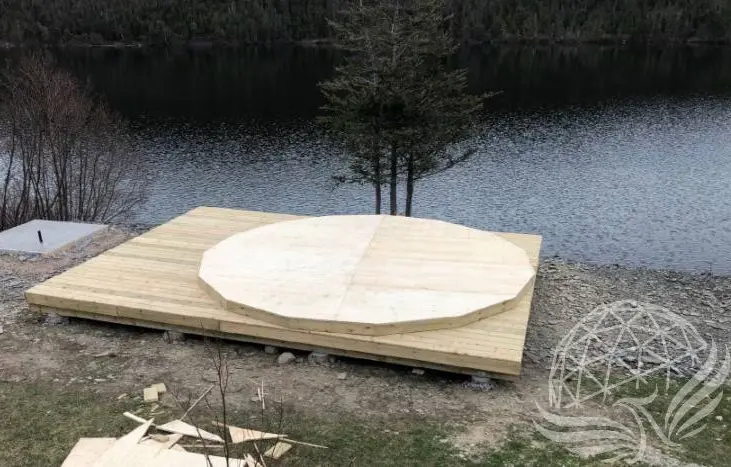
Why not a round Platform?
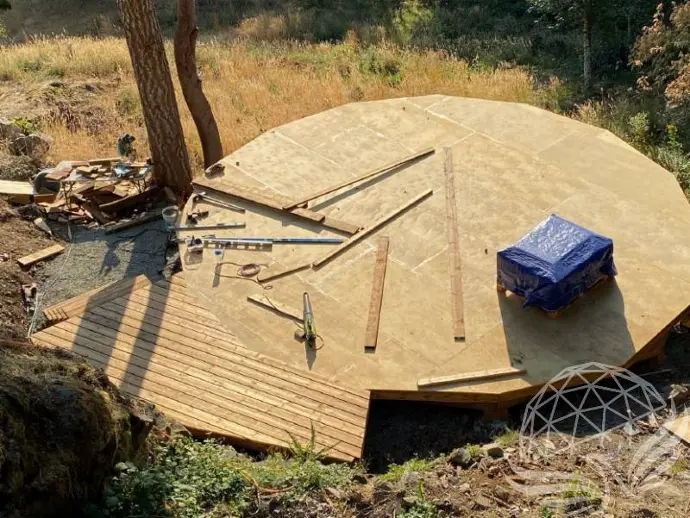
A geodesic dome is not actually round! recommended for our most popular 3V Our common sizes have 10, 15 or 20 sides. With a round platform, the curve would stick out in between the hubs, making it hard to weatherproof.
Follow our precision designed Exact Fit Platform Plans for the best results!
Foundation Considerations for ExactFit Platform Plans
Our ExactFit platform plans are designed with concrete pier blocks, which require level, firm ground for proper installation. If your site is uneven or has challenging terrain, you may need to modify the foundation accordingly:
- Sloped Ground: Use posts under the deck corners to level the structure.
- Rocky Terrain: Consider poured concrete footings for added stability.
- Soft Ground: Screw piles provide a secure and adjustable foundation.
For site-specific recommendations, consult a local builder or engineer to ensure the best foundation for your dome.

Wooden Platforms
Advantages:
- Elevation and Versatility: Wooden platforms can be elevated off the ground, making them ideal for uneven or sloped terrain. This flexibility allows you to place your dome in a variety of locations without extensive ground preparation.
- Environmental Impact: Wooden platforms are low-impact on the environment, as they can be built with sustainably sourced materials and are removable if necessary.
- Accessibility: Elevating the platform can also help with accessibility, providing an easy entry point for your dome.
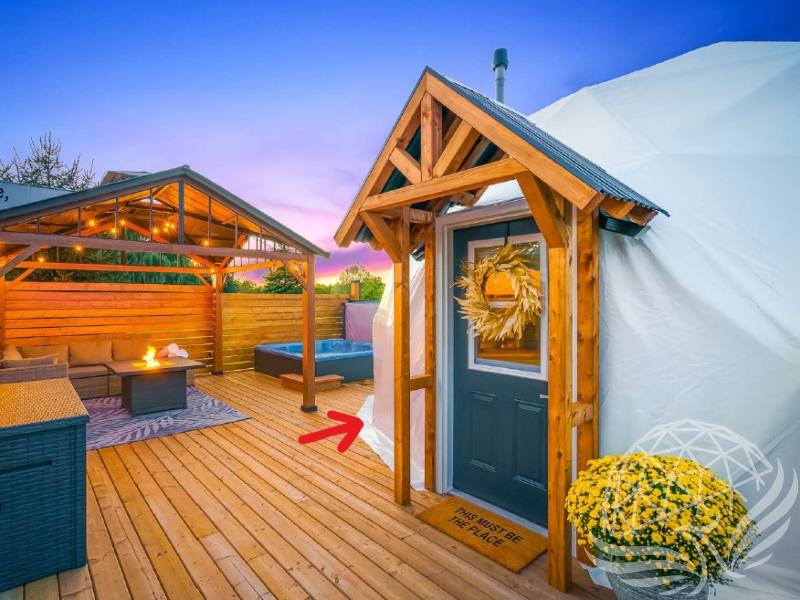
Rectangular Decks
What is wrong with this picture?
Nothing, you may think - it looks like the perfect luxury Dome resort setup!
It seems like a great idea to have a larger deck around your dome so you can walk around it and have a sitting area, like in this picture.
However, this can bring with it some complications for weatherproofing and insulation. Also, decking is expensive, so why waste it underneath the flooring of your dome? Floor insulation is a factor as well - without it, your dome will be 3 season at best.
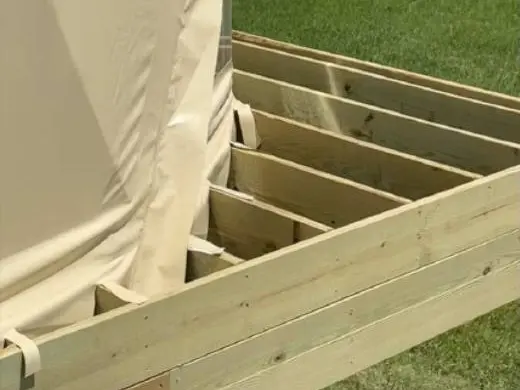
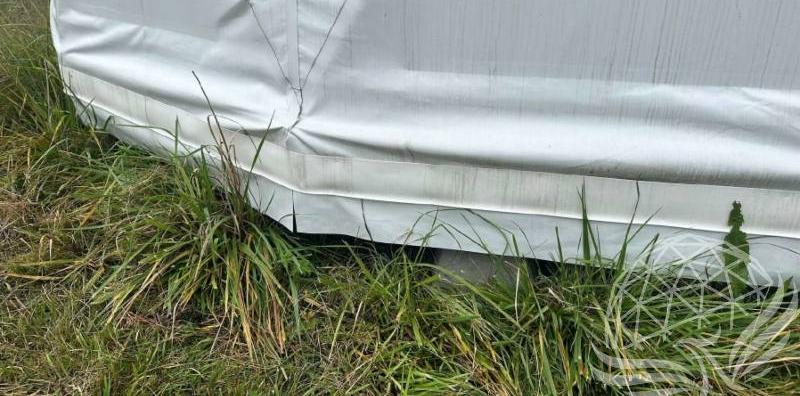
We strongly advise against simply plopping a dome onto a rectangular deck. Water will run under the edge, quite possibly causing rot, mold, insect infestation and other problems. There are a few ways to help avoid these issues:
- At the very minimum, cut a perimeter gap in the
decking so that rain water can drain through and down
and cannot travel into the dome, and tuck the cover
skirt through that gap to the best of your ability.
Plan for better weatherproofing from the start:
- Build your larger deck structure, then lay out a plywood subfloor on top in the measurements of our exact fit platform plans.
- Insulate the subfloor from underneath by adding blocking and insulation or spray-foam from the bottom
- Cut the dome skirt in order to tuck between the joists, and ideally add a weatherproofing membrane on the joists where the water will run off the dome.
- Then run the decking up to the outside of the dome with a drainage gap for water.
- This is still not ideal as water will still continuously run down the joists when it rains, but at least water will not be able to seep into the dome, or sit on your decking - but much better than the centipede infestation, rot and mold we have seen under the wet flap...

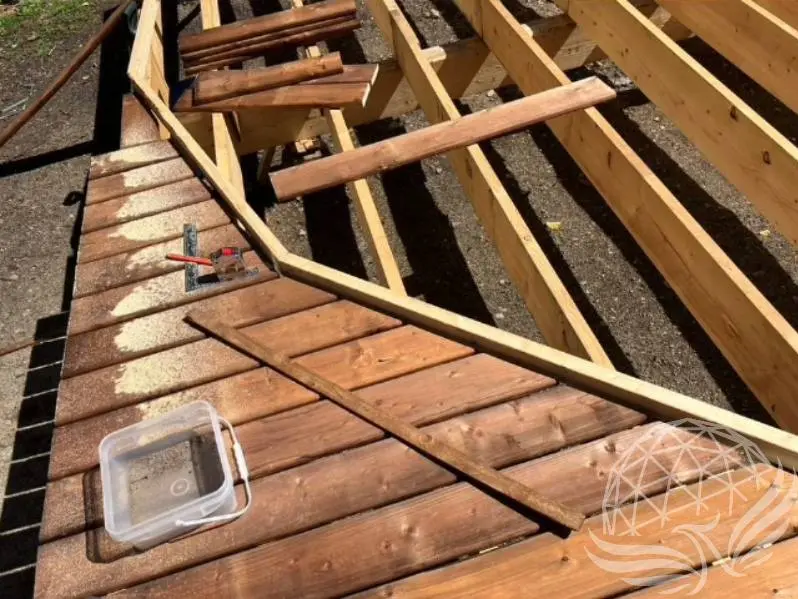
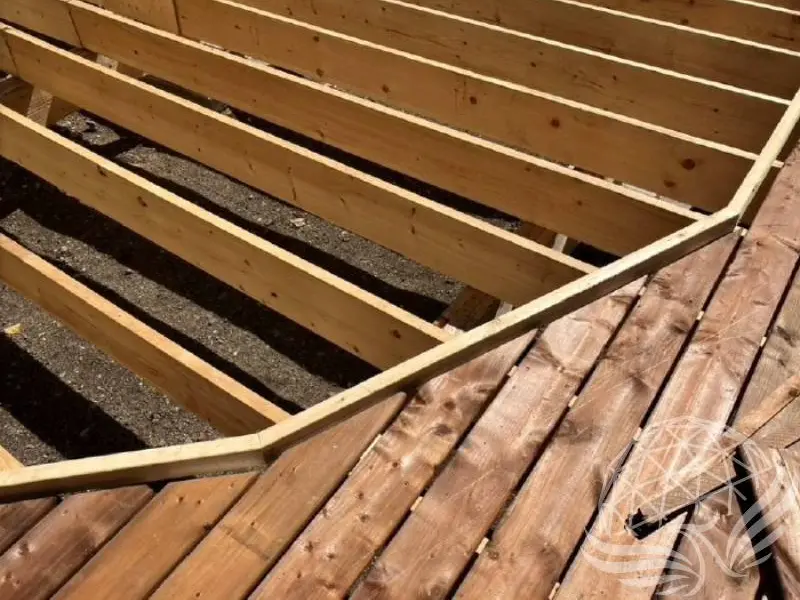
Build up from the deck:
- Build your larger deck structure, then build up the top joist structure only of exact fit platform plans - including the insulation and top plywood.
- don’t waste expensive decking underneath the platform - 3/8 plywood will do!
- ideally leave a drainage gap
around the exact fit platform to
avoid excessive moisture on the
decking
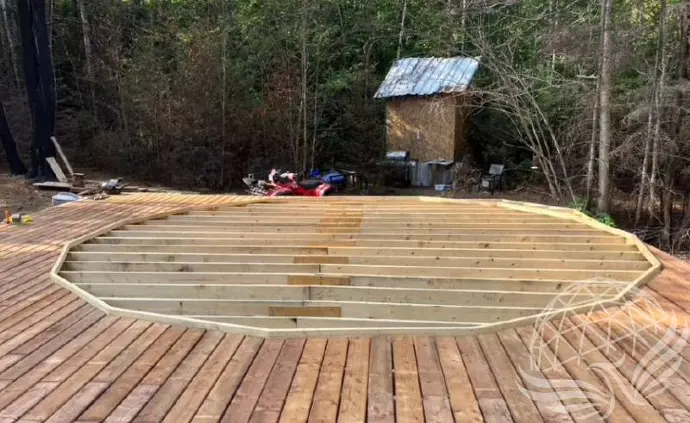
Dome floor integrated in deck:
- This is another way of doing it - the joist structure is integrated in the deck only raised up a little bit - but don’t forget that drainage gap for the cover skirt to tuck through!
More pictures to illustrate this option:
Build your sitting deck where you need it
You may only need a sitting deck or
porch on one side of the dome - a walkaround
deck often has a lot of wasted
space (and expensive lumber) where it
will rarely ever be used.
Just build a deck where you need it after
the platform is built - and again, make
sure to leave that drainage gap (not in
picture) for runoff water to shed.
Weatherproofing your Dome
Start by stapling the cover skirt to the outside edge of your exact fit platform. With the removable panorama window, you will not want to staple the skirt below the window. You could apply sticky velcro tape to seal it and still be able to open it. We have found a type of PVC trim on a roll (shur trim wall base at home depot) useful for both the outside and inside edges of the dome. You can staple or screw it and caulk the screw holes.
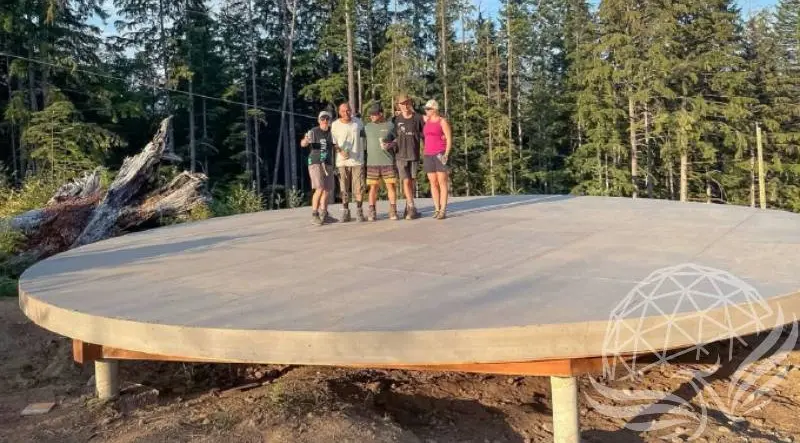
Concrete Slabs
A number of customers have opted for concrete slabs, often with integrated in-floor heating. This may be more cost-effective considering lumber prices, and definitely a long-lasting and comfortable option.
To create your concrete form, start from our exact fit platform plans, use the perimeter measurements and cut angles. Use the measurement on the SHORT side of your lumber instead of the long side. That way your concrete slab will be the same size as the wooden platform would it be. All the services can be integrated into the concrete slab.
For anchoring the bolt, you will use expansion bolts
through the dome brackets. It may be
advantageous to have some type of perimeter
drainage around the dome (gravel etc.) to make
sure that all water can run away from the structure.


Construction Tips:
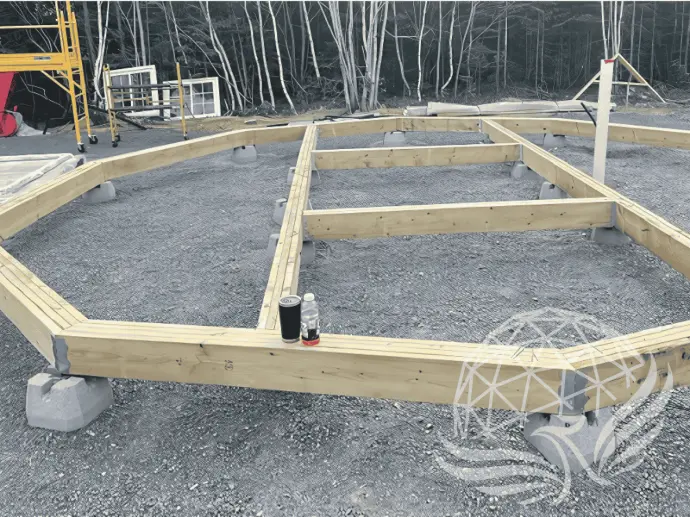
- Exact-Fit Plans: We provide complimentary exact-fit wooden platform plans for our most common dome sizes on the Resources page of our website. For more precise requirements, engineer-stamped versions are available upon purchase for 6-11m domes, specifically for AB, BC, NB, NS, and ON.
- Weatherproofing: Building an exact-fit platform ensures ease of sealing the dome’s cover skirt and any weatherproof trim around the platform’s edges. This prevents rainwater from pooling and seeping into your dome or subfloor.
Alternative Flooring Options
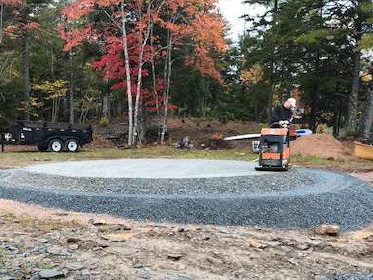
Gravel Floors:
- Drainage: Gravel floors provide excellent drainage and are relatively easy to install. They are a cost-effective option that works well in many environments.
- Insulation: While gravel floors are great for drainage, consider adding an insulated floor layer inside the dome to improve thermal comfort.
Earthen/Cob Floors:
- Natural Aesthetic: Earthen or cob floors offer a natural, rustic look that blends seamlessly with the environment.
- Sustainability: These materials are eco-friendly and can be sourced locally, reducing the overall environmental impact of your dome construction.

Poured Concrete Floors:
- Durability and Stability: Concrete floors are highly durable and provide a solid, stable foundation for your dome. They are particularly suitable for permanent installations.
- Radiant Heat: Consider incorporating radiant heat into your concrete floor for enhanced comfort, especially in colder climates. This can significantly improve the livability of your dome during the winter months

Additional Considerations
Drainage and Insulation:
- Drainage Gaps: If you require a larger flat deck around your dome, ensure there are adequate drainage gaps to prevent water accumulation around the perimeter.
- Elevated and Insulated Floors: For best results, build up an elevated, insulated floor for the dome itself internally. This not only improves thermal efficiency but also adds an extra layer of protection against moisture.
Platform Plans and Support:
- Our exact-fit platform plans are designed to make the construction process straightforward and efficient. These plans help you achieve a perfect fit for your dome, ensuring stability and ease of maintenance.
- For detailed guidance and support, visit our Resources page, where you can access platform plans and other essential information.
By choosing the right platform for your Phoenix Dome, you can create a stable, comfortable, and environmentally friendly foundation. Whether you opt for a wooden platform, gravel, earthen, or concrete floor, careful planning and execution will ensure that your dome is set up for success. Explore our resources and start building the perfect foundation for your dome today!